


I love how versatile labeling the room activities can be! You can label using pretty much any category — colors, beginning/ending/middle sounds, nouns, adjectives. You can label using many different materials — the movable alphabet, stickers, pre-written cards, blank cards. And it’s a great way to hold the interest of the child — whether she’s just at the beginning of her writing/reading journey or pretty far along!
One thing to keep in mind with beginning writers is the importance of invented spelling. Children learn how to write and read by sounding out individual letters and stringing them together. They will most likely write the word with phonetically-accurate spelling — which may be far from its “real” spelling, since the English language can be pretty silly. You should not correct invented spelling — it is a normal part of writing development and will usually resolve itself on its own once the child has begun reading books and noticing the correct spellings of words. If you were constantly being corrected on something, would you want to continue to do it? Probably not! So let it happen.
Here are 10 labeling the room activities you can do with pre-readers, advanced readers, and everyone in between!

Labeling the room with colors! I know, this picture doesn’t exactly match the description — it’s more of a color scavenger hunt than a labeling the room activity. So let’s reimagine it! Take those colorful pages of construction paper, snip off a smaller square, and tape them to objects in the room that match the color. You could even use post-it notes for an added point of interest. This is a pre-reading activity that actually includes no reading at all — just getting used to labeling according to category.

Once your child has mastered a few beginning sounds, write each one on a small card (I like to use cardstock) and invite your child to label objects in the room with them. “/m/, /m/, mop! Mop starts with /m/!”

This is infinitely more fun with stickers! Write those beginning sounds on return address labels (I cut ours in half) and stick them right on some objects! /t/ is for table, /m/ is for measuring tape, and /f/ is for flower.
Once your child has mastered beginning sounds, start listening for ending sounds. Label those in the same ways as above! “Mop… mop ends in /p/!”
Finally, introduce middle sounds — the most difficult sounds to hear. “Mop…. I hear an /o/ in the middle of mop!”

Once your child is pretty comfortable building words with the movable alphabet, there’s no reason to keep that on a work rug! Use the movable alphabet to label nouns around the room, like “mop” and “dustpan.”

Beginning readers will enjoy discovering a box full of pre-written noun labels to use around the room — bonus if you can label the “box” the labels came in!


Then invite your child to write her own noun labels — and remember to embrace that invented spelling. “Red shelf” is much easier to sound out phonetically than “headphones.”
After every noun your child can think of has been labeled, move on to adjectives! I don’t have a picture for this one, but you’ll begin the same way you began with nouns — using the movable alphabet or pre-written labels.
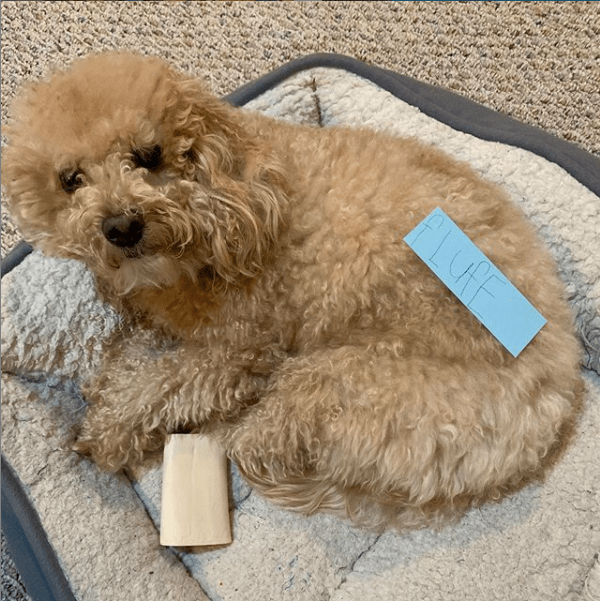
Then invite your child to write words to describe some of the nouns you labeled before. Our “dog” is “fluffy!”

BONUS labeling activity — in everyday life! If you’re putting things into a box for storage or packing up to move, invite your child to help label the contents of each box! Depending on your child’s writing level, you could be quite surprised when it comes time to open those boxes again, which is always fun! This packing box was from our move 2 years ago, and it was actually one of the more “readable” boxes Lila labeled — “building stuff” and “mermaid tail.”

You must be logged in to post a comment.